Budget Management
Core Features of Budget Management:
How to Create Budget for a Year?
Benefits of Budget Allocation:
Fund Allocation to the Projects
Modify Allocated Funds to the Project
Marking the Projects as Completed
If Allocated Fund matches with Actual Project Cost
If Allocated Funds exceeds the Actual Project Cost
If Allocated Funds are less than the Actual Project Cost
Actions included in the Budget Log
Surplus Returned from “Project Name”
De-allocated Funds –Info Icon – if Deleted/Made Private
De-allocated Funds - Project Name
Actions not included in the Budget Log
Budget Management offers a centralized, auditable solution to define, track, and allocate funds across multiple projects. It ensures alignment with organizational financial strategies by serving as the source for creating and managing fiscal budgets, assigning funds per financial year, and monitoring fund distribution across projects. It helps in:
-
Centralizing management and allocation of funds across all budgets.
-
Streamlining tracking and reporting of fund usage.
-
Boosting transparency and accuracy in financial oversight.
-
Facilitating quick reallocation with clear visibility into over- and underfunded projects.
-
Strengthening compliance and audit readiness through detailed transaction logs.
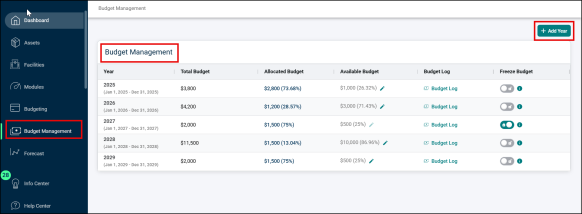
Navigate to Budget Management
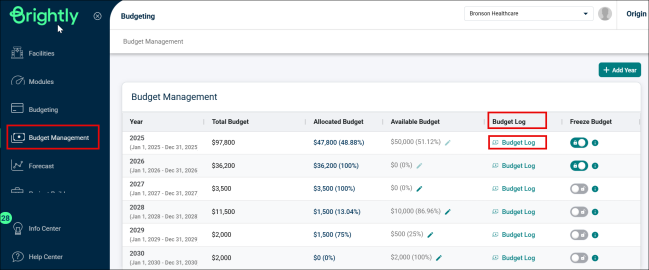
Click the Budget Management option from the left-side menu.

The Budget Management page displays a table having the following column:
-
Year: Displays fiscal years, each with its start and end dates below.
-
Total Budget: The overall budget set for each year.
-
Allocated Budget: Amount assigned to projects, including the percentage of the total.
-
Available Budget: Remaining funds not yet allocated along with percentage of total. A pencil icon to edit the budget.
-
Budget Log: A link to open a detailed log or history of budget changes.
-
Freeze Budget: Toggle switch to freeze the budget, preventing further changes for the year.
Core Features of Budget Management:
-
Budget Creation
-
Budget Allocation
-
Fund Tracking
Budget Creation
Budget Creation refers to a structured approach for managing financial resources by setting up distinct budgets for different calendar years. This systematic method allows organizations to plan their finances in alignment with annual goals, and maintenance strategies over each year.
Benefits of Budget Creation
-
Simplifies budget management across fiscal years with clear visibility of allocated, available, and remaining funds.
-
Reduces time and effort spent on budget allocation, freeing up resources for more strategic activities.
-
Enhances fund utilization experience.
How to Create Budget for a Year?
-
Go to the Budget Management option from the left-side menu.
-
Click the +Add Year button in the top right corner.
-
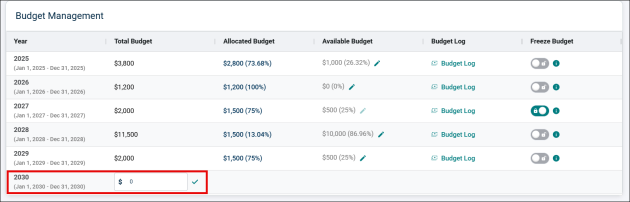
A new row for the current fiscal year will appear in the Budget Management table.
-
The start date of the fiscal year is determined by the date configured at the Organization level within the Settings option. You can check how to edit this here.
-
Enter an amount for the fiscal year under the Total Budget column and click the right mark (✔).

-
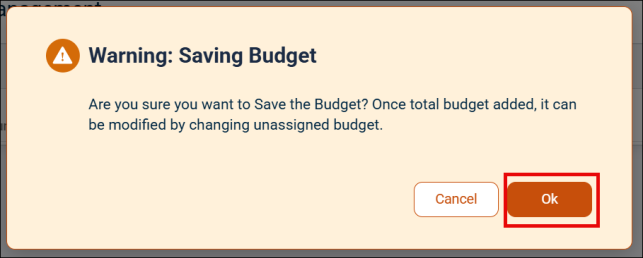
A warning pop-up Warning: Saving Budget will appear. Click OK to proceed.
-
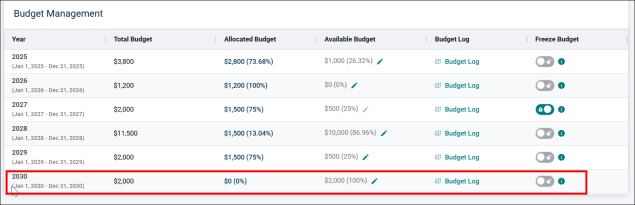
The budget for the selected fiscal year will be displayed in the Budget Management table.
NOTE The total budget, once added, cannot be edited, only the available budget can be modified. However, only if the value for Total Budget is 0, then it can be edited.
-
To edit the budget after adding, click the pencil icon (
 ) under Available Budget.
-
Make the required changes and click the (✔) mark to save.

-
Once the available budget is edited, the Total Budget automatically gets updated.

NOTE Whenever a budget is allocated to any project, the amount in Allocated Budget increases and the amount in Available Budget decreases accordingly. You can track the allocated funds in Funded to Project log from the Budget Log from every year.
Freeze Budget for a Year
The ability to freeze the budget for a specific year helps in financial control and accurate tracking of the budget. This ensures the budget cannot be changed for future state and helps to track the budget allocation. The freeze/unfreeze of budget is for each year separately.
-
Use the Freeze/Unfreeze toggle button to freeze the budget for a specific year.

(i) icon displays a message saying “Freeze prevents further changes to this budget year” when hover over.

-
If the button is greyed out, then the budget is unfreeze.
-
To freeze the budget, click the toggle button.
-
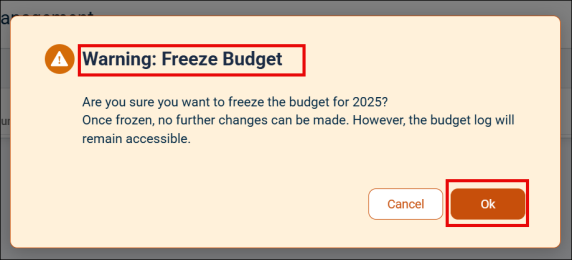
A pop-up saying Warning: Freeze Budget appears on the screen, click OK to freeze the budget. The warning message asks confirmation to freeze the budget also alerts that one the budget is frozen, no changes can be made, however the budget log remains accessible.
-
Once you click OK, the toggle turns green and the budget freezes. No further changes are allowed for this year budget.

-
To unfreeze the budget, toggle the button again.
-
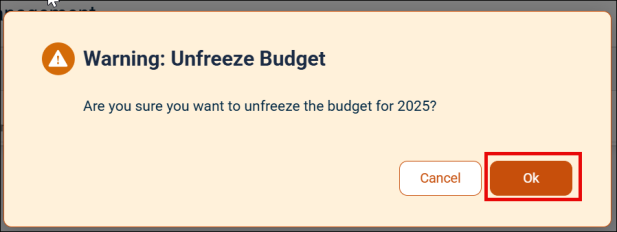
A pop-up saying Warning: Unfreeze Budget appears, click OK to unfreeze.
-
The toggle greys out and the budget is again unfreeze and changes can be made.
Budget Allocation
Budget allocation is the process of distributing available financial resources from yearly budgets to specific projects based on organizational needs and priorities. It allows managing and allocating funds, identifying over- or under-funded projects, and moving funds to provide better financial visibility.
Benefits of Budget Allocation:
-
Enables allocation of funds to projects from available yearly budgets.
-
Allows multiple allocations from any different yearly budget.
-
Improves visibility into over/underfunded projects and simplifies fund movement.
-
Facilitates adding additional funds for over-budget projects and transferring excess funds for under-budget projects.
Fund Allocation to the Projects
When allocating funds to a project, the user can select from only the available (unallocated) funds from specific years, and only from budgets that are unfreeze. However, funds from multiple years can be allocated to a project.
NOTE Only the Conceptual and Committed funds can be allocated with funds.
-
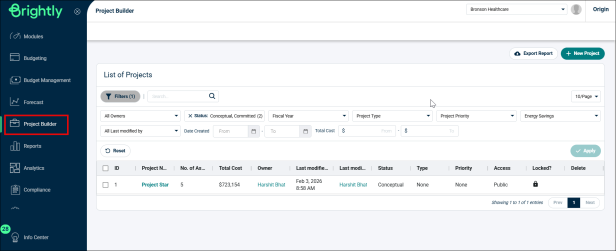
Go to Project Builder from the side menu.
-
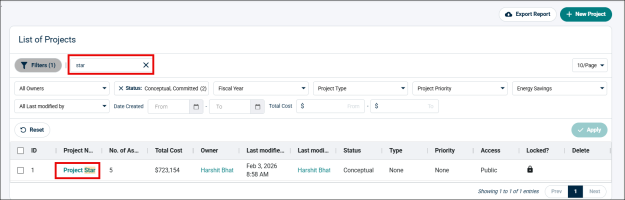
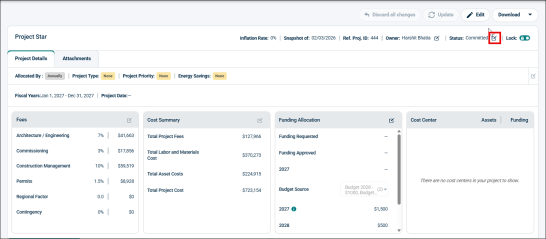
Search and click on the Project from the List of Projects that you need to allocate budget to.
-
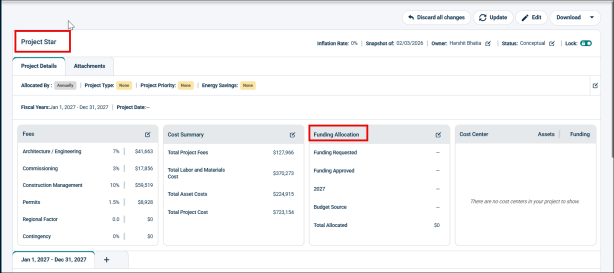
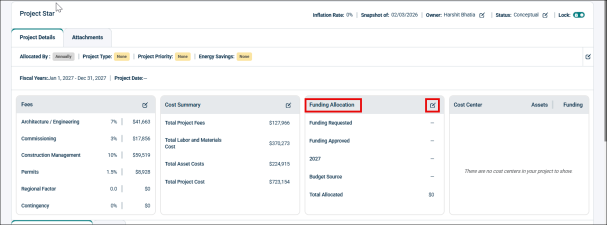
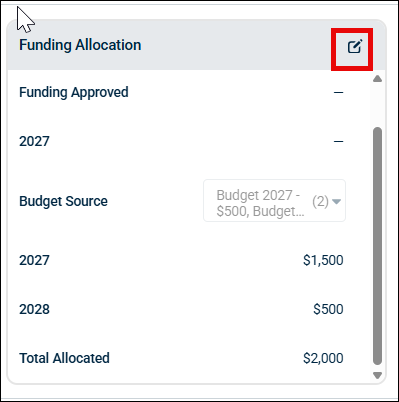
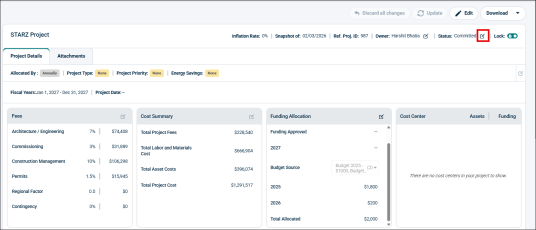
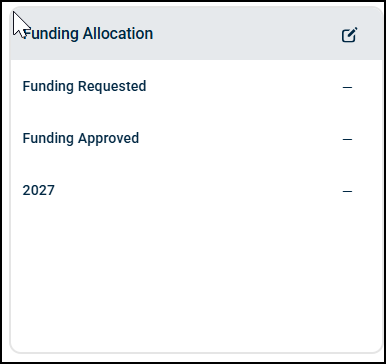
Project details page will open, find the Funding Allocation tab.
-
Click the edit icon in the Funding Allocation tab.
-
When the Funding Allocation tab becomes editable, click the Budget Source dropdown.
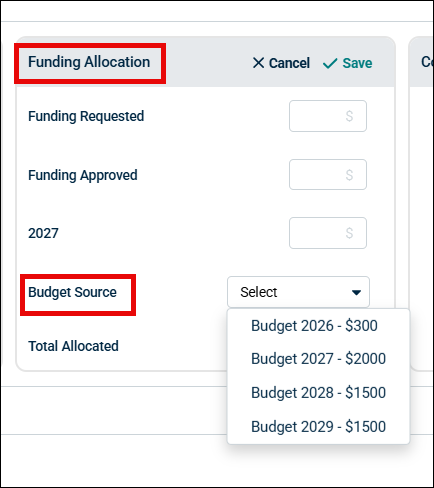
The Budget Source dropdown will show the list of all available budget from which you can allocate funds. Only the unfreeze budgets are shown in the list.
-
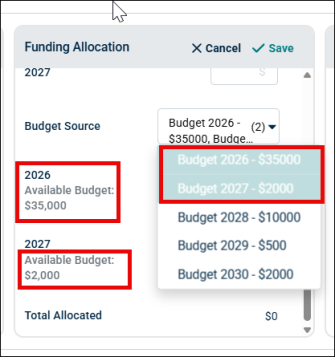
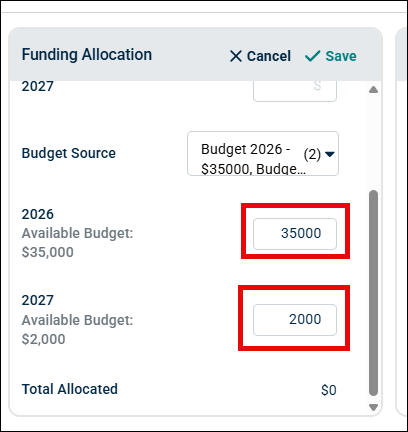
Click on the budget years that you want to use for this project. The budget year along with available budget will be displayed below the Budget Source.
-
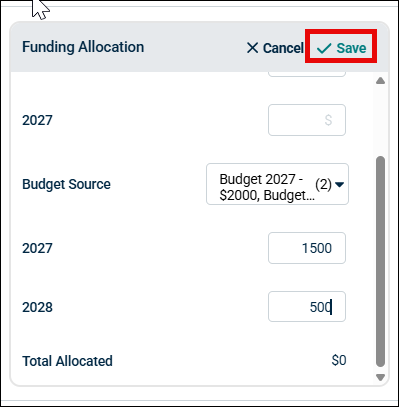
Add the amount for the project for the selected years.
-
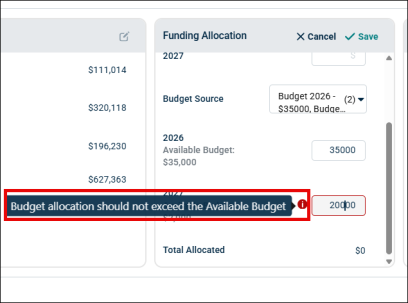
You can only allot the budget amount equal to or less than the available budget amount for the year. If the amount exceeds the available budget, it gives warning, “Budget allocation should not exceed the Available Budget” and it will not allow you to proceed.
-
Then click the Save button to save the allocated funds.
-
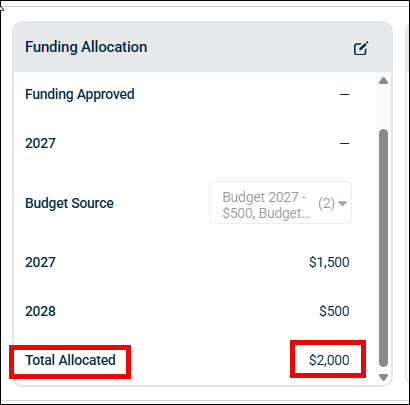
It will automatically populate the Total Allocated fund for the project.
Modify Allocated Funds to the Project
You can also modify the already allocated funds to a project.
-
Click the edit icon from the Funding Allocation tab.
-
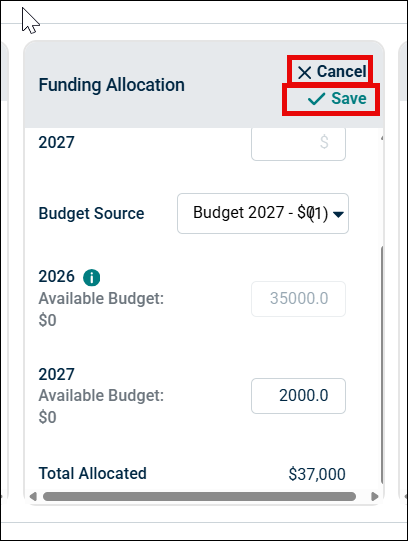
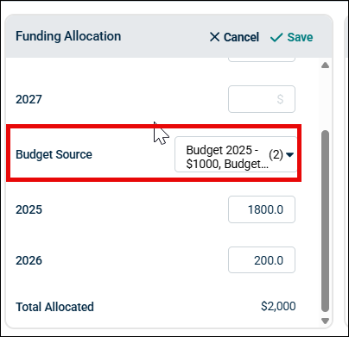
Scroll down to Budget Source and make the required changes. You can add a new year and add funds for it or make changes to already selected years.
NOTE If any budget is frozen in the Budget Management tab, then it will not show in the Budget Source list. Check Freeze Budget for a Year.
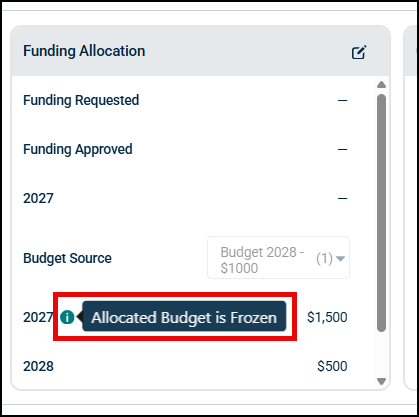
-
If a user freezes a specific year’s budget and later attempts to allocate or modify funds for that year, the changes will be restricted for that year. A warning message, “Allocated Budget is Frozen” is displayed, indicating that no further modifications are allowed.
-
Click Save to save the changes. You can also click Cancel if you want to discard the changes.
Marking the Projects as Completed
Before marking any project complete, the user needs to ensure that the allocated funds accurately match the project's actual financial requirements. During this step, the users have to input the actual total project cost. This helps in verifying any discrepancies—whether an over-allocation or under-allocation of funds before finalizing the project.
-
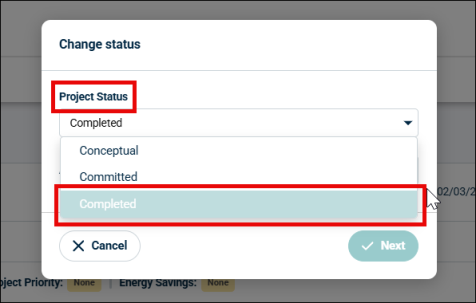
To mark a project complete, click the edit icon next to the Status.
-
It will open Change Status pop-up with Project Status dropdown.
-
Choose Completed from the dropdown.
-
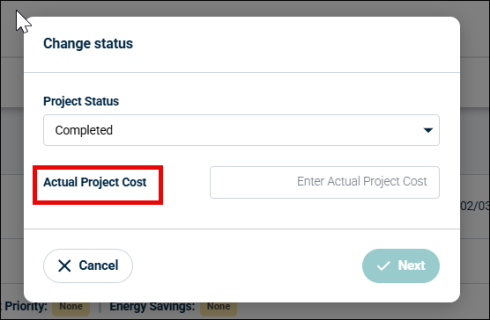
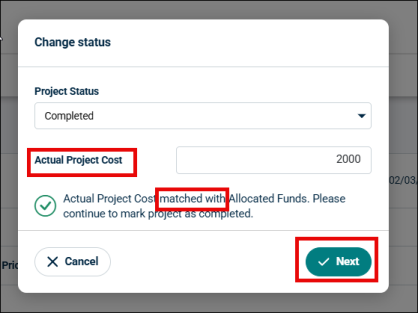
Then enter the Actual Project Cost in the given field.
-
It creates 3 scenarios for Actual Project Cost:
If Allocated Fund matches with Actual Project Cost
-
If the entered Actual Project Cost matches the allocated funds, the system displays a message,
“Actual Project Cost matched the Allocated Funds. Please continue to mark project as complete.”
-
Click Next.

-
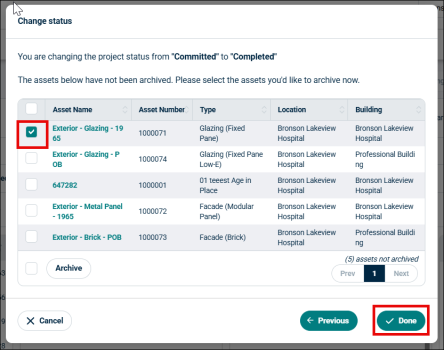
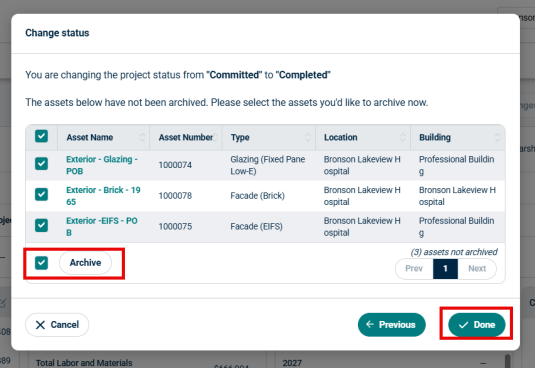
A new pop-up will appear, confirming the Status change and asking you to archive the assets.
-
Mark the Assets you want to archive and click Done.
-
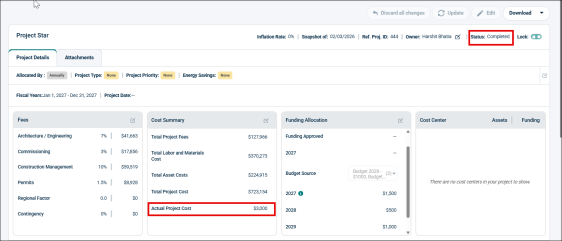
The project status is updated to Completed.
-
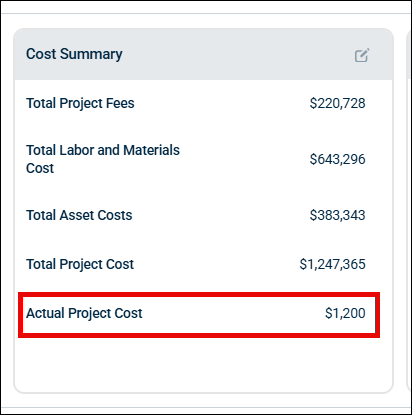
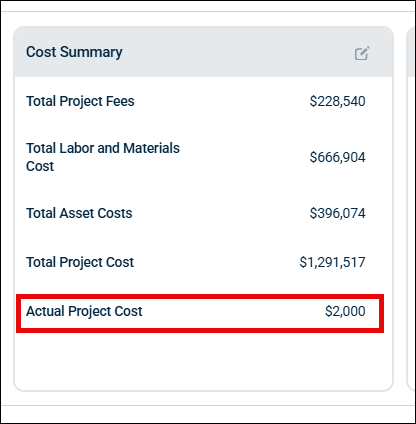
The Actual Project Cost gets added in the Cost Summary Section.
-
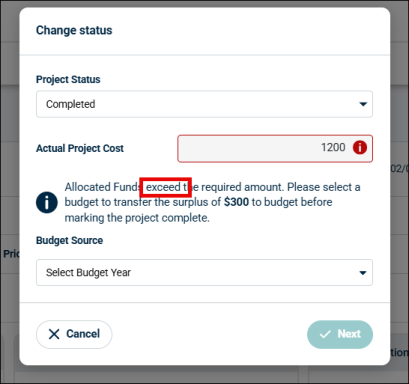
If Allocated Funds exceeds the Actual Project Cost
If the entered Actual Project Cost is less than the Allocated Funds, the system displays a message,
“Allocated funds exceed the required amount. Please transfer the surplus amount $XXXX to budget before marking the project complete.”
-
The Budget Source dropdown menu will appear, select a year to transfer the surplus amount.
-
All budget years are displayed in the dropdown menu, regardless of their freeze/unfreeze status or whether funds have been utilized from it.
-
If a budget year is frozen, the system first unfreezes it before surplus funds can be added; available funds will then increase.
-
For unfrozen budgets, surplus funds can be added directly, allowing available funds to be available for allocation to other projects fund allocation.
NOTE Note: If you are a Client Admin (CA), Tenant Admin (TA), or Partner Admin (PA), you have permission to unfreeze budgets and transfer surplus funds.
If you are not an admin (CA/TA/PA), you cannot unfreeze budgets yourself. Please contact your administrator to mark the budget complete and process the surplus transfer.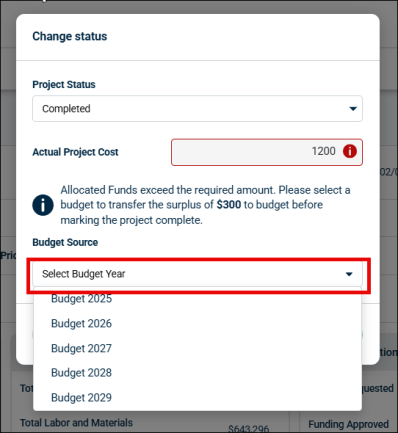
-
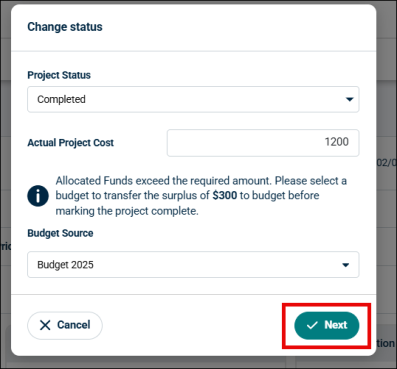
-
Click Next after selecting the year.
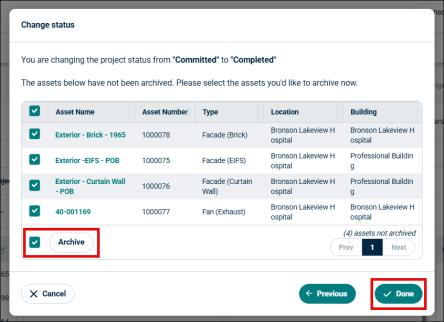
-
A new pop-up will appear, confirming the Status change and asking you to archive the assets.
-
Mark the Assets you want to archive and click Done.
-
The project status is updated to Completed and the surplus is transferred to the selected year’s budget.
-
The Actual Project Cost gets added in the Cost Summary Section.
If Allocated Funds are less than the Actual Project Cost
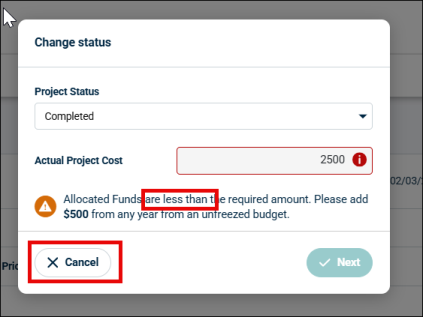
If the entered Actual Project Cost is more than the Allocated Funds, then the system displays a message,
“Allocated funds are less than the required amount. Please add XXX Funds from any year from unfreezed Budget.”
-
Click the Cancel button and proceed to add more funds from the Funding Allocation tab.
-
Go to the Funding Allocation tab, add the insufficient funds from the Budget Source dropdown. Check the Budget Allocation steps here.
-
Once you have added the allocated funds equal to the actual project cost, again click the edit icon close to the Status.
-
Select Completed in the Project Status and enter the Actual Project Cost.
-
It will now display that the Actual Project Cost matched Allocated Fund.
-
Click Next.
-
A new pop-up will appear, confirming the Status change and asking you to archive the assets.
-
Mark the Assets you want to archive and click Done.
-
The project status is updated to Completed and the Actual Project Cost gets added in the Cost Summary Section.
Fund Tracking
The fund tracking feature helps to track the activities done at the Budget Management section. This displays the logs for the fund transaction actions performed for a budget year. All the users having any role have access to view Budget Log.
Benefits of Fund Tracking
-
Provides a structured and auditable way to manage financial resources across multiple budgets and projects.
-
Simplifies tracking of budget usage.
-
Makes it easy to view and analyze all budget transactions, including additions and allocations, with comprehensive logs.
-
Saves time with direct links from transaction logs to detailed project information.
View Budget Logs
-
Go to the Budget Management tab from the side left menu.
-
Click the Budget Log button for the year you want to view the logs.
NOTE Budget Logs are shown for each budget whether it is freeze/unfreeze.
-
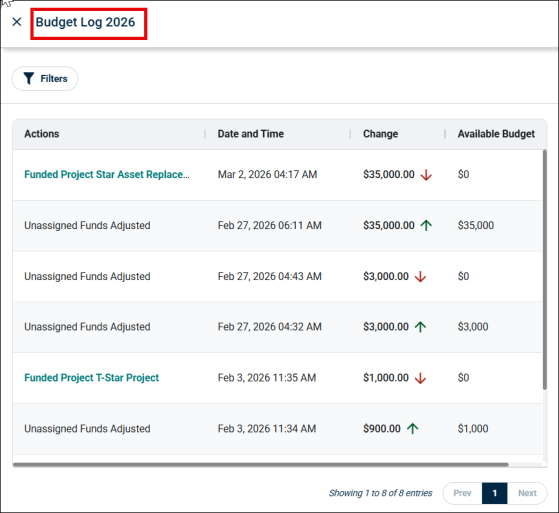
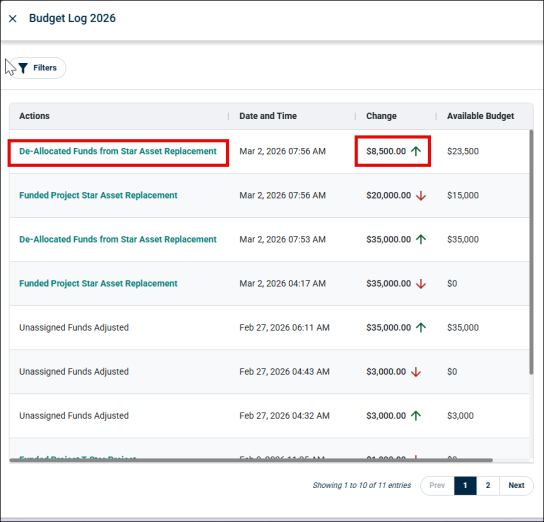
A side panel appears showing a chronological (most recent first) list of all budget-related transactions.
-
Budget log table will have the following columns:
-
Actions: The action which was performed and logged.
-
Date and Time: The time when the action was performed.
-
Change: What changed occurred in the budget amount because of the performed action.
-
Decrease in funds allocated to a project is shown by downwards arrow (↓) with the amount.
-
Increase in funds added to budget is shown by downwards arrow (↑) with the amount.
-
-
Balance: The remaining balance after the action was performed.
-
Actions included in the Budget Log
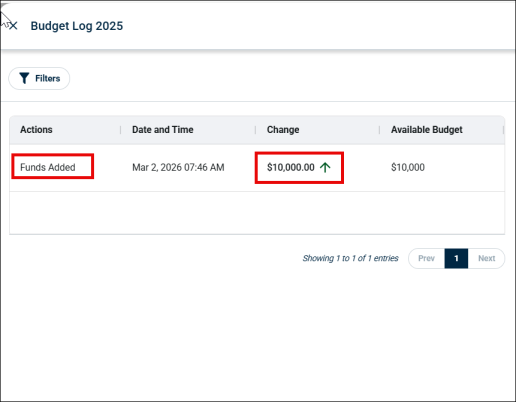
Funds Added
It records when new funds are added to the year’s budget, increasing the total available funds. It displays the total amount added with an upward arrow (↑).
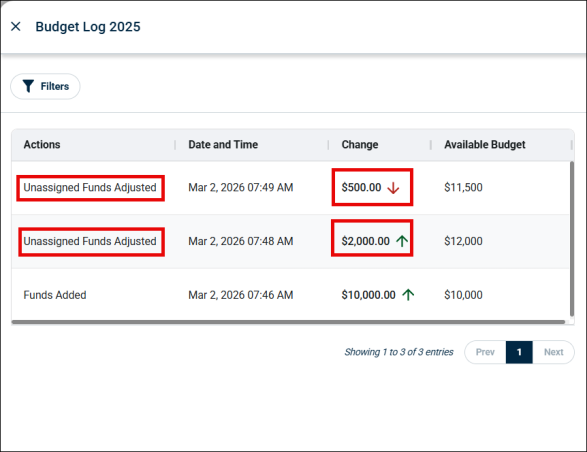
Unassigned Funds Adjusted –
It tracks changes to unassigned budget (available funds) for any unfreeze budget. This adjustment can be increase or decrease and are shown by (↑) and (↓) arrows respectively.
Funded Project “Project Name”
It tracks the allocation (transfer) of funds from the budget to a specific project. The log shows project name, date- time, change with (↓) arrow and remaining balance.
The project name is,
-
Clickable- if project exists and navigates to the project page.
-
Non-clickable- if project has been deleted. It displays info icon saying “Project no longer exist"

Surplus Returned from “Project Name”
It displays the surplus funds returned to the budget after project completion. The log displays the source project from where the fund was returned with a clickable link that navigates to the project and (clickable if exists), returned amount with (↑) arrow.

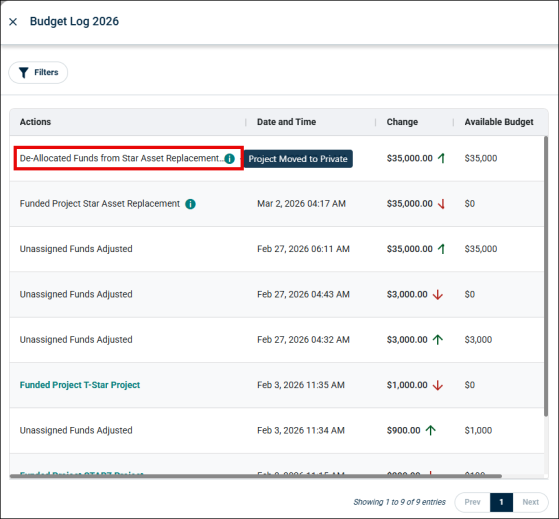
De-allocated Funds –Info Icon – if Deleted/Made Private
It tracks the funds restored to the budget after a project is deleted or converted to private. The log displays the project name (non-clickable) with info icon and the amount with (↑) arrow.
If Project Made Private:
Making a project private using Edit Project pop-up gives a warning message saying, "Changing the project to Private will remove all allocated funds This action is irreversible and funds cannot be restored.”
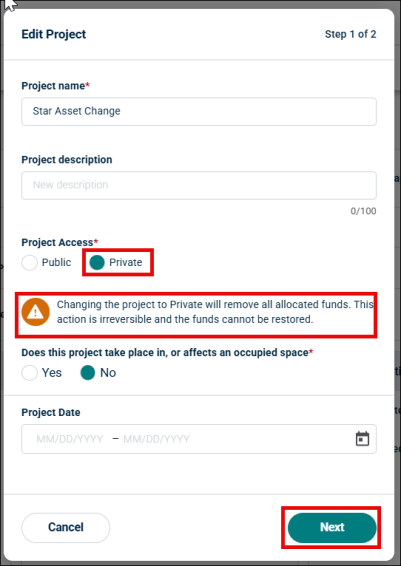
Once you click Next and Save, all allocated funds are removed.
A budget log will be created with project name and an info icon saying Project Moved to Private.
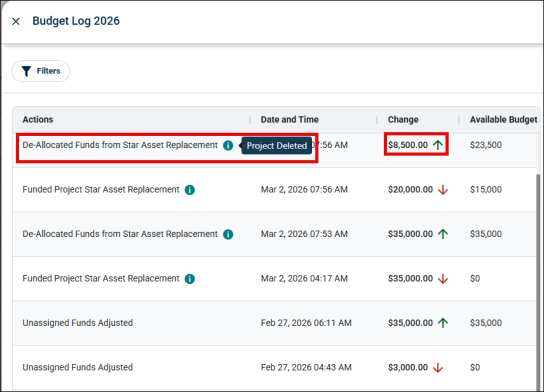
If Project Deleted:
If a project is deleted, then the funds get transferred back to the same budget and a log is generated with project name and a message saying Project Deleted.
De-allocated Funds - Project Name
It logs the reallocation of unused funds from a project back into the budget when a funds are de-allocated, but project is not deleted. The log displays the project name with clickable link that redirects to the project and the amount with (↑) arrow.
Actions not included in the Budget Log
Certain actions do not appear in the log:
-
Project Completed
-
Freeze Budget
Filtering the Budget Log
Budget logs can be filtered using the predefined filters.
-
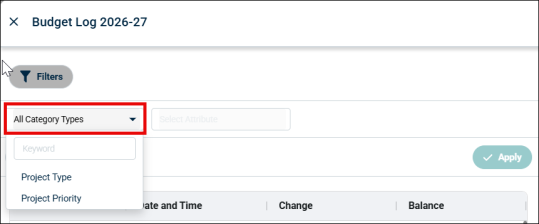
Click the Filter button in the Budget Log panel.

-
All Categories and Attributes drop-down will appear on the screen. The options in the Categories and Attributes dropdown are based on the projects that are in that budget log.
-
Only one type of Category can be selected in the dropdown at a time.
-
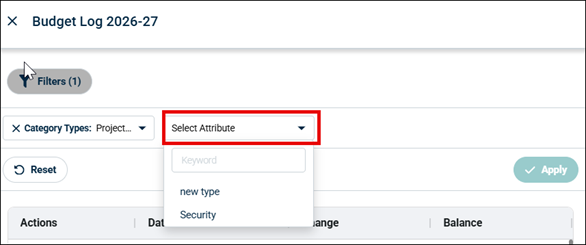
Attribute options are only visible when a category is selected first.
-
If any Category/Attribute is removed/added from Project page, the dropdown options automatically get update.
-
-
Select the desired category from the All Category Types dropdown menu.
-
Refine your search by choosing relevant options from the Select Attributes dropdown.
-
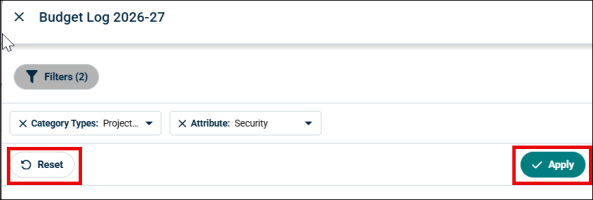
Click Apply to view logs that match your selected criteria.
-
To clear your selections and display all logs again, click the Reset button.
-
The log list will update automatically based on the filters applied.
-
